CSV Importer Plugin
CSV Importer plugin allows you to import multiple video links from CSV-Format files.
How to install
The ways of installing plugins into your website is the same as other plugins. Just download each plugin zip file, unzip them and copy folders and files in root(mostly upload) folder to your server directly. Overwrite files if needed.
Once you install plugins(just copy!!!), Reload your website to have an effect.
1) Download the plugin zip file (filename is like: AVS - CSV Embed Importer 1.4 (for v8).zip) from your PC.
2) Unzip the zip file to your PC, then upload folder and Installation.txt file are extracted.
3) Explore upload folder and select all folders, and paste them into your existing server root directory (Overwrite them if needed).
How to use the csv importer plugin
Note that these operations can be handled with site administrator privilege.
First, visit siteadmin page of your website(for example: http://www.yourdomain.com/your-subdirectory/siteadmin), and login as a siteadmin.
Step 1. Prepare a CSV file
CSV files can be created and edited by many applications such as Excel or even text editors.
Create a CSV file and type each video information by line.
Note that the information such as embed, thumbs, title, tags, category and duration are required for each video. Description is optional.
For example, you can type video lists in a CSV file as like:
http://www.yourdomain.com/your-video.mp4,http://www.domain.com/your-thumb.jpg,Video title,"Tag1, Tag2",VideoCategory1,10:00:00
http://www.yourdomain.com/your-video-2.mp4,http://www.domain.com/your-thumb-2.jpg,Video title-2,"Tag3, Tag4",VideoCategory1,10:00:00
...
In the above example, the information of each video include embed, thumbs, title, tags, category and duration in order.
And, the delimitor is comma(,). Note that the delimitor is used to manage CSV format.
Step 2. Manage CSV Formats
Once you create a CSV file, you should create a CSV Format corresponding to your CSV file in Categories - CSV Formats page.
1) Login to siteadmin panel, and Click on Videos / Add Videos / CSV Importer menu on the left sidebar.
2) In this page, click on Manage Formats link, then Categories - CSV Formats page is displayed.
3) In this page, Fill in Format Name and Format.
For example, Type My CSV Category in Format Name, and embed,thumbs,title,tags,category,duration in Format textbox.
The order and delimitor of Format is corresponding to your CSV file. In this example, comma(,) is used as delimitor.
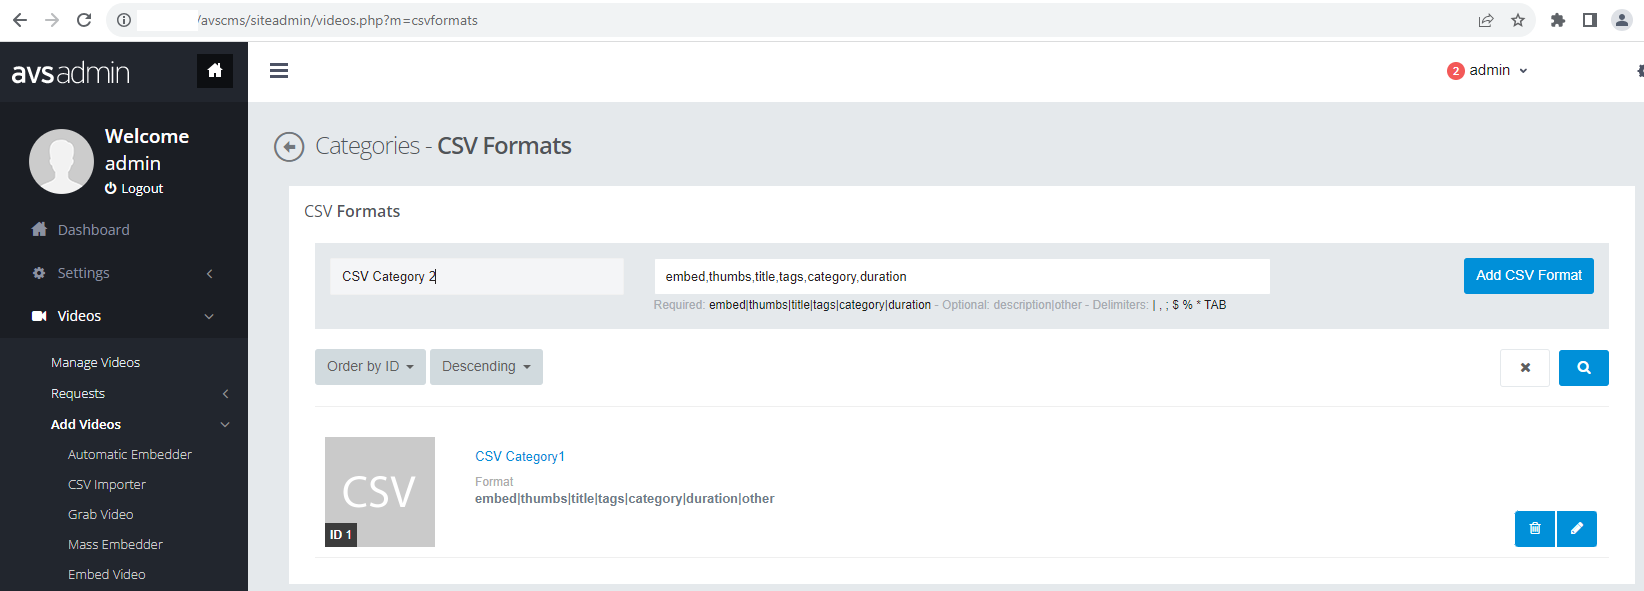
4) Click on Add CSV Format button to add your CSV Format.
If your CSV Format is already registered, you don't need to add it again.
Step 3. Import a CSV file.
1) Login to siteadmin panel if you don't login yet, and Click on Videos / Add Videos / CSV Importer menu on the left sidebar.
2) Type CSV File URL or select a file by clicking Choose File button.
3) Select CSV Format which you already added in the previous step.
4) Click on Next button, and the next page is displayed.
5) Fill in Username, and select Category option as Autodetect or one of your video category.
If you select Autodetect, the videos are categorized based on your CSV file. If you want to add videos into one category manually, select this category.
6) Set Maximum Thumbs slider value. The maximum is 20.
7) Set Maximum Records, the count which is added once from selected CSV file.
If you set 0, all of videos are added.
8) If you don't want to add duplicated videos, check Skip Adding Duplicate Videos. This is default.
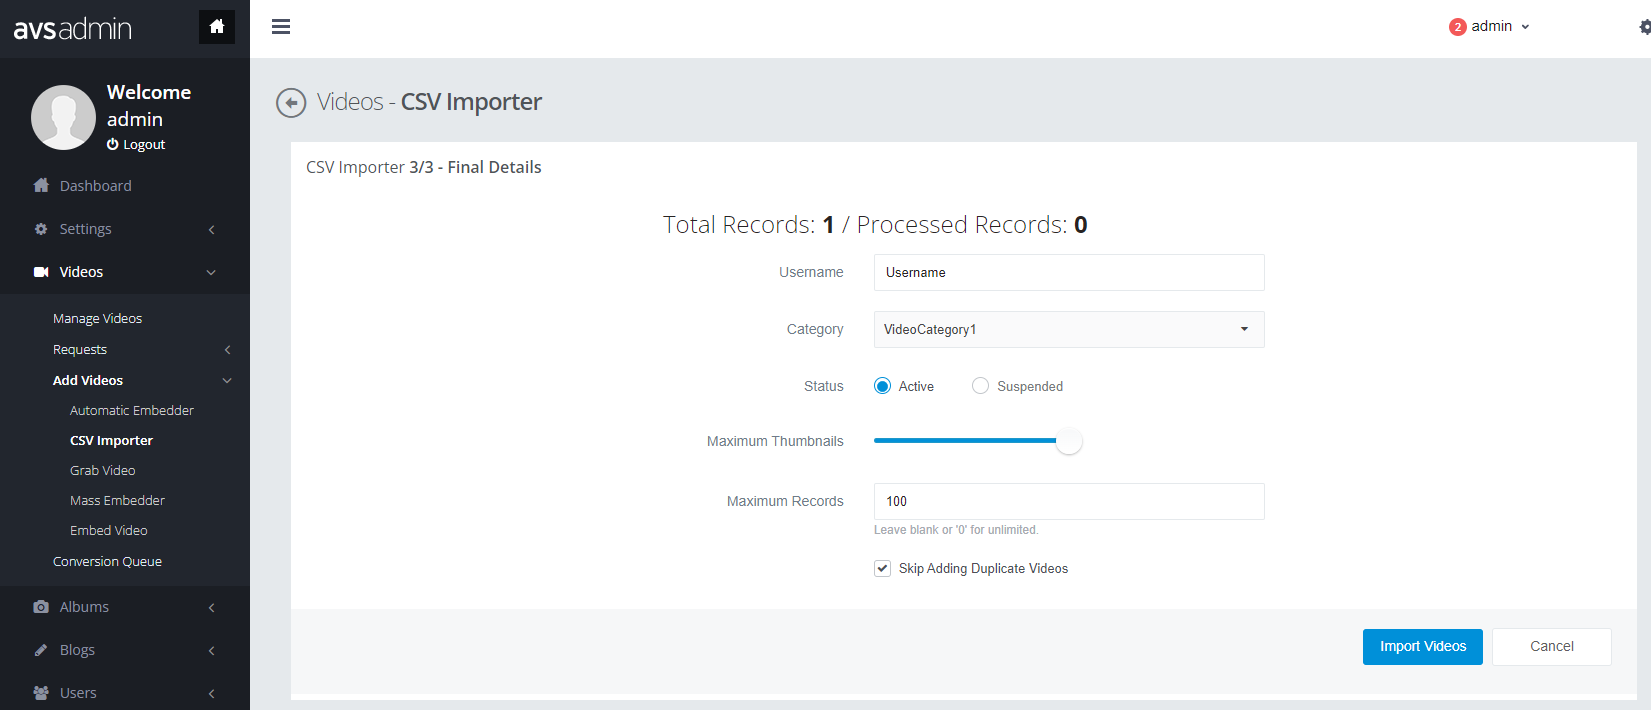
9) Click on Import Videos, then video lists from your CSV file are proceeded and added into your website.